CREATE A ROCKSET COLLECTION WITH DATA FROM DYNAMODB
Rockset has a managed DynamoDB connector that bulk loads data into a Rockset collection. After the bulk load is complete, Rockset continuously syncs data whenever there is a change in the DynamoDB table through DynamoDB’s Stream API. As soon as there is a change in the rockset_carpurchases table, Rockset reflects that change within seconds. This is because Rockset leverages Change Data Capture (CDC) streams.
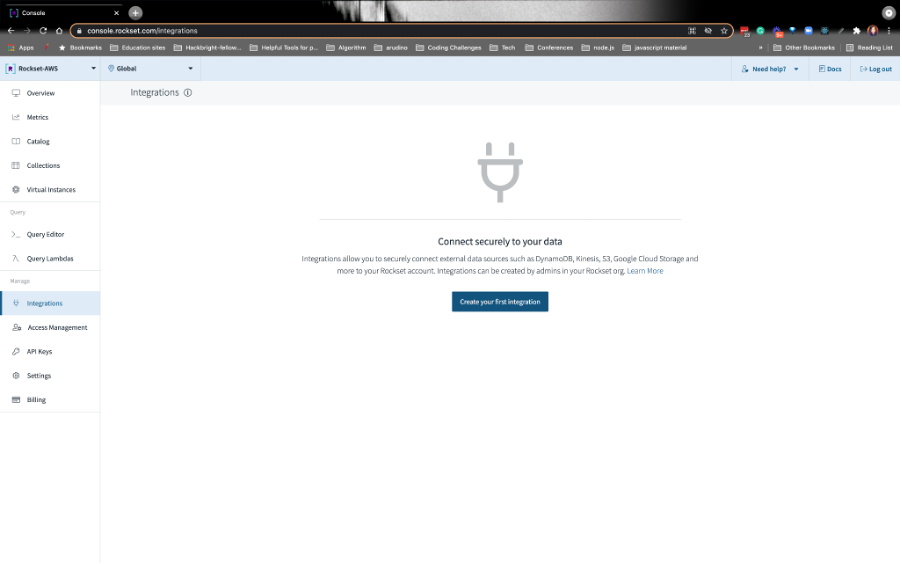
1. CREATE A ROCKSET ACCOUNT AND DYNAMODB INTEGRATION
- Go to the Rockset Console → click on the Integration tab on the left nav and then click on the button Create your first integration:
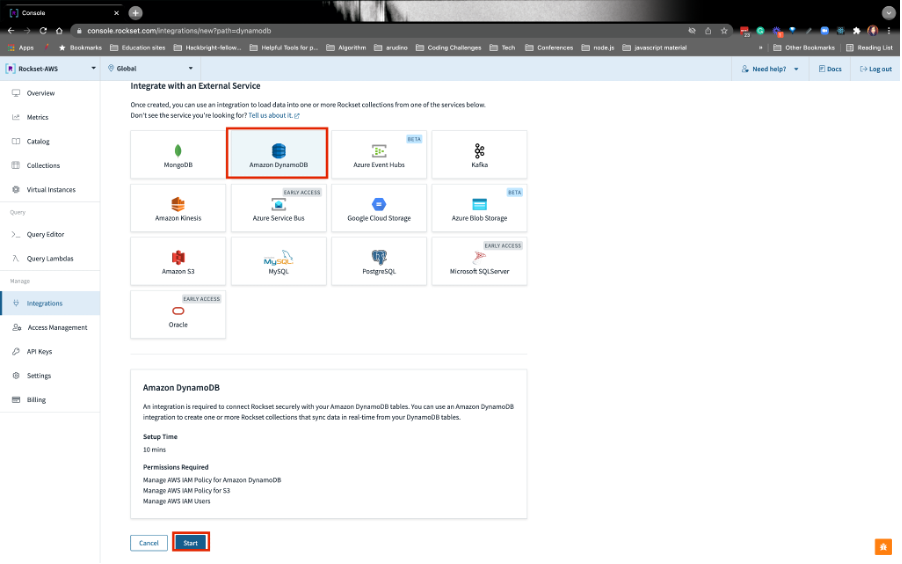
2. SELECT THE AMAZON DYNAMODB DATA SOURCE
Click on the DynamoDB data connector and Start:
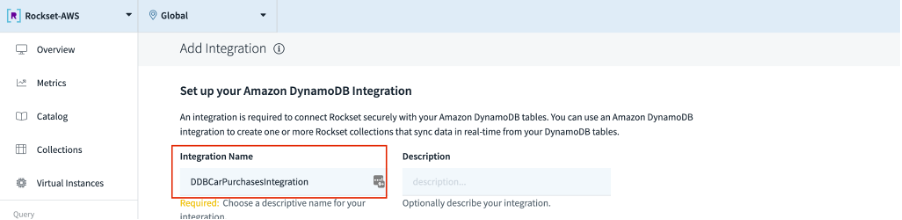
3. FILL IN THE INTEGRATION NAME
Create an integration called DDBCarPurchasesIntegration.
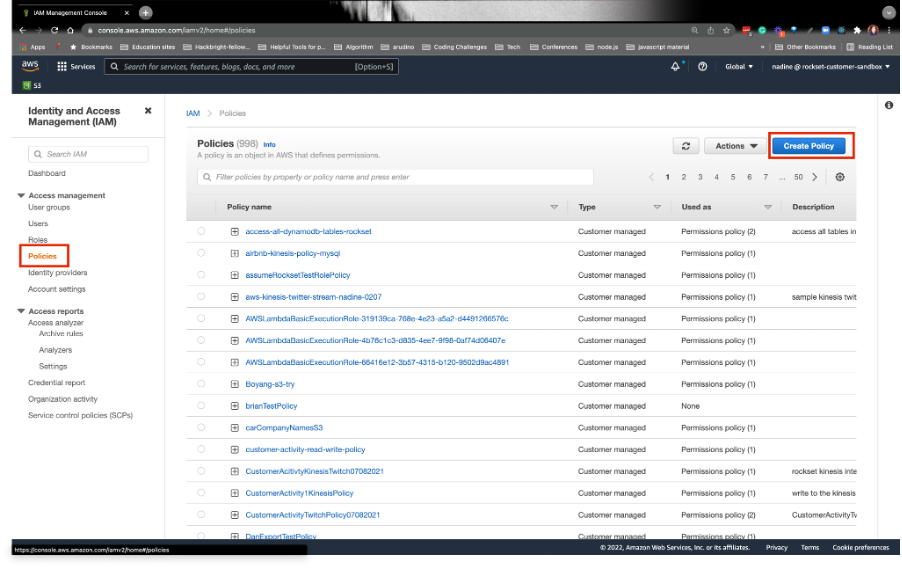
4. CREATE AN AWS IAM POLICY
- Navigate to AWS IAM services and click on the Policies tab. Click on the Create Policy button:
- Grab the empty S3 bucket name from the S3 service. It’ll have this naming pattern: rockset-data-integration-[AccountID].The AccountID will be a different value for every participant:
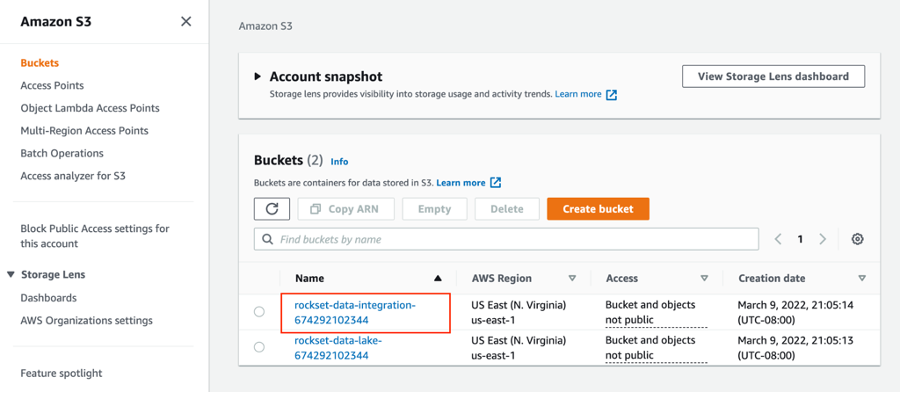
When you create the AWS IAM Policy for DynamoDB, you must replace the S3 bucket name’s AccountID with the value you have.
Overwrite and paste the below in the JSON tab (don’t forget to update the S3 bucket name in the JSON below):
    {
         "Version": "2012-10-17",
         "Statement": [
           {
             "Effect": "Allow",
             "Action": [
               "dynamodb:GetShardIterator",
               "dynamodb:Scan",
               "dynamodb:DescribeStream",
               "dynamodb:DescribeExport",
               "dynamodb:GetRecords",
               "dynamodb:DescribeTable",
               "dynamodb:DescribeContinuousBackups",
               "dynamodb:ExportTableToPointInTime",
               "dynamodb:UpdateTable",
               "dynamodb:UpdateContinuousBackups",
               "s3:PutObject",
               "s3:GetObject",
               "s3:ListBucket"
           ],
           "Resource": [
               "arn:aws:dynamodb:*:*:table/rockset_carpurchases",
               "arn:aws:dynamodb:*:*:table/rockset_carpurchases/stream/*",
               "arn:aws:dynamodb:*:*:table/rockset_carpurchases/export/*",
               "arn:aws:s3:::bucketname",
               "arn:aws:s3:::bucketname/*"
           ]
           }
         ]
       }
It should look like this:

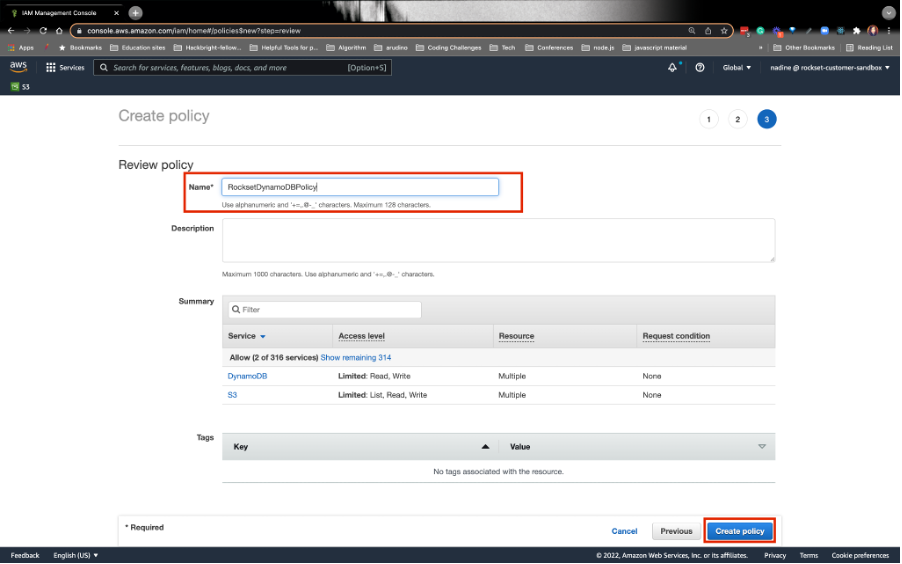
When you’re done, go ahead and click on Next: Tags
Immediately click on Next: Review.
Give the policy name as RocksetDynamoDBPolicy. Then, click on Create policy:
5. FILL IN S3 BUCKET INFORMATION ON ROCKSET
- Enter the S3 Bucket information on Rockset using the following naming convention: rockset-data-integration-[AccountID]. Replace the [AccountID] with the value you see in the bucket name.

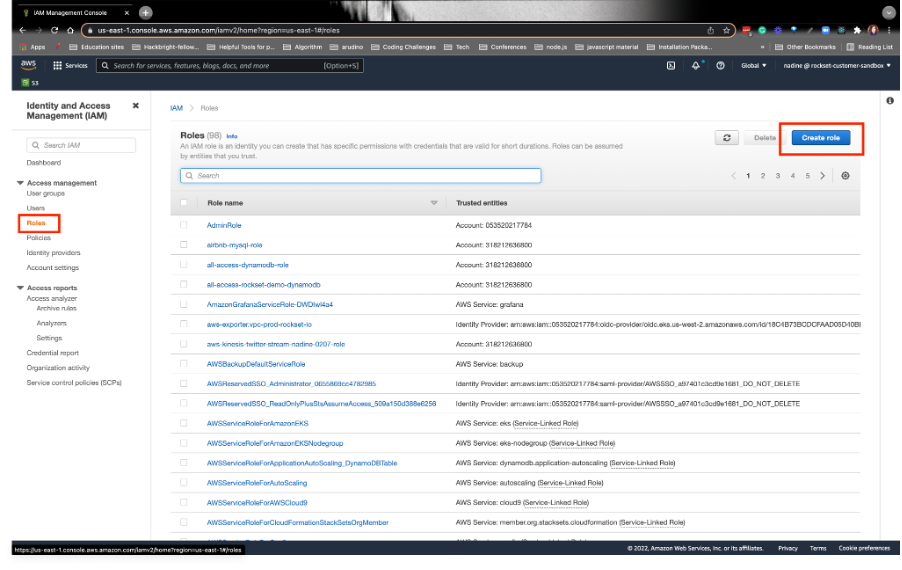
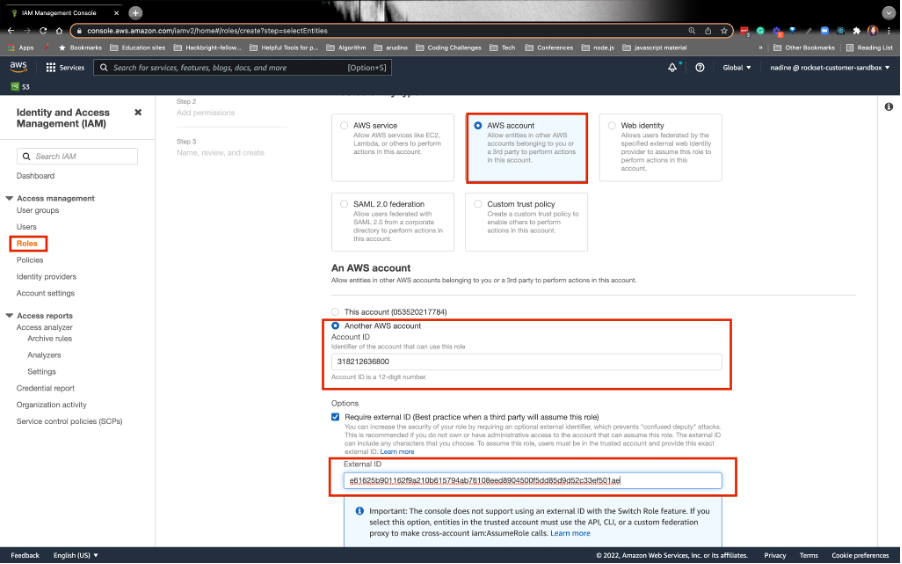
6. CREATE AN AWS IAM ROLE
- Navigate to the AWS IAM services and click on the role on the left-nav bar. From there, click on Create role:
- Switch to Rockset Console and grab the Rockset Account ID and external ID on the Rockset DynamoDB Integration page
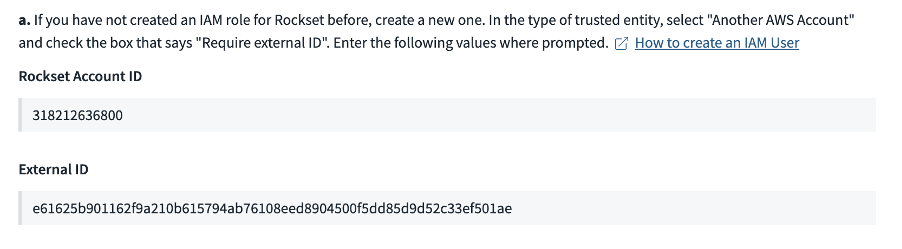
- Refer to the image below:
a) Switch back to the AWS Role page and click on the AWS account box (2nd red box image).
b) From there, you are going to click on Another AWS account (3rd red box image).
c)Paste the Rockset Account ID.
d) Under Options, check the Require external ID box. Paste the external ID you see on the Rockset DynamoDB integration page in the text box here (4th red box image).
e) Afterward, click Next on the bottom right.
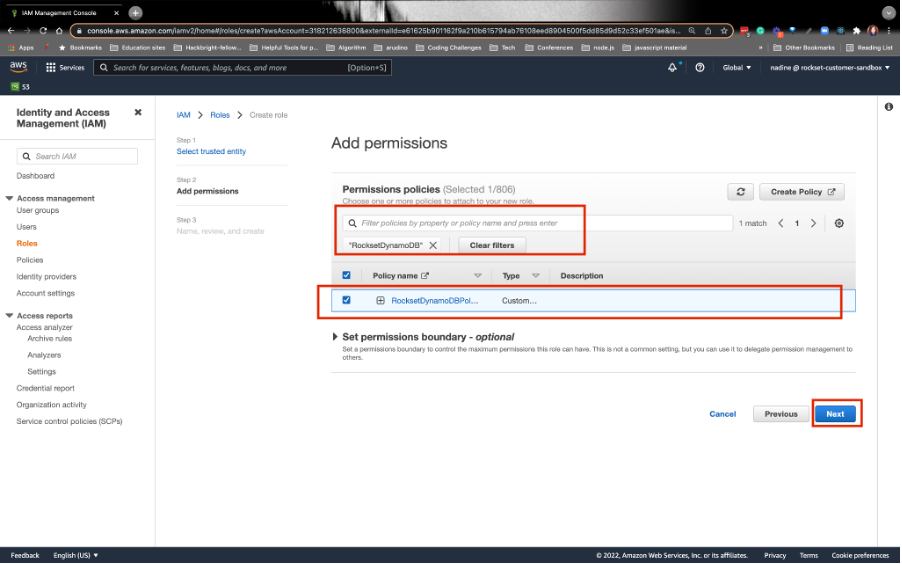
- To find the policy we just created in step 4, go ahead and type the policy name in the search bar— RocksetDynamoDBPolicy. Be sure to click the policy so you can attach it to the role. Afterward, click on Next.
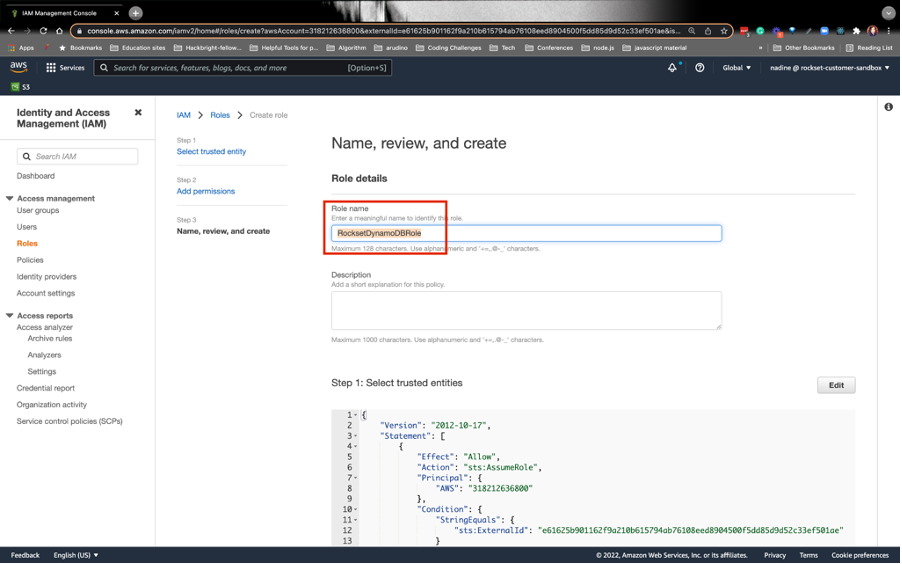
- Give the Role Name: RocksetDynamoDBRole. On the bottom right, click on Create role:
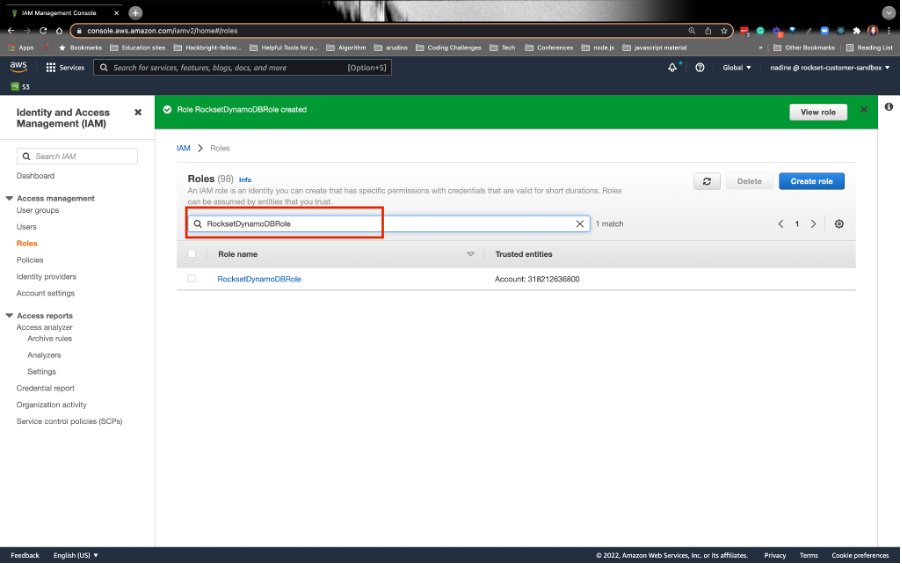
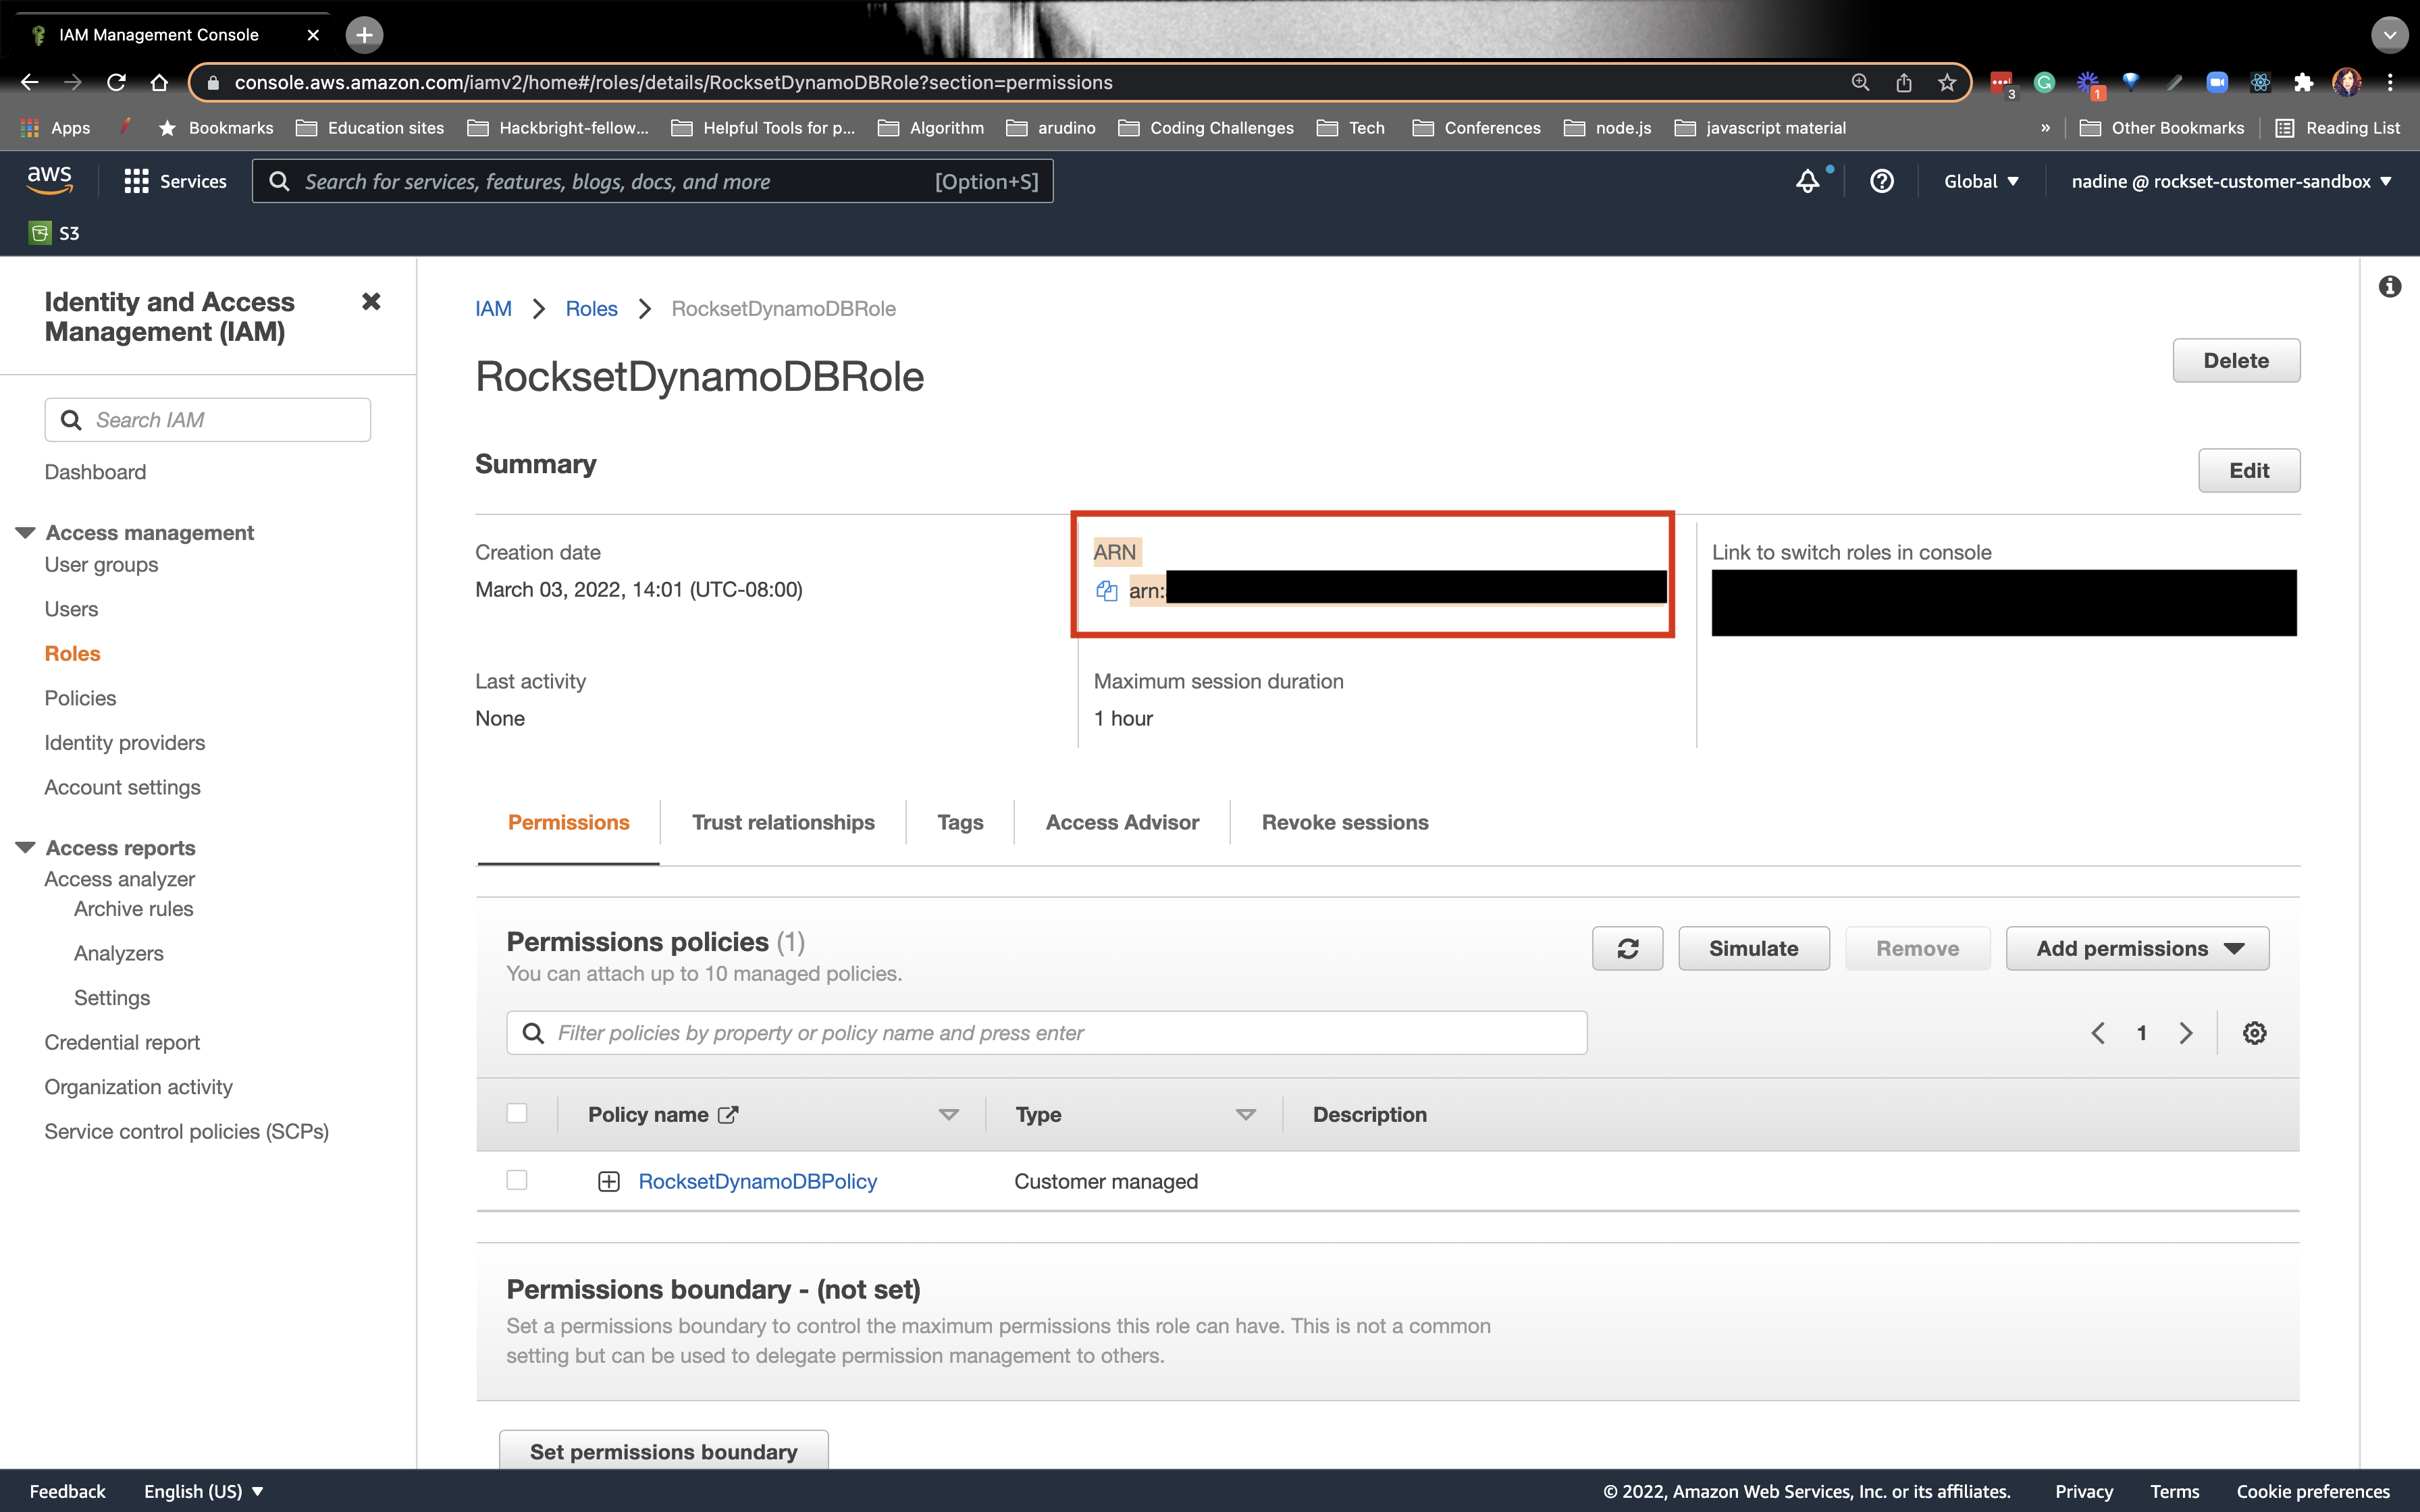
7. RETRIEVING THE ROLE ARN
- Navigate back to the role, and search for the role you created, RocksetDynamoDBRole. From there, click on the role:
- Grab the Role ARN on the AWS side and paste on the Rockset Integration section:
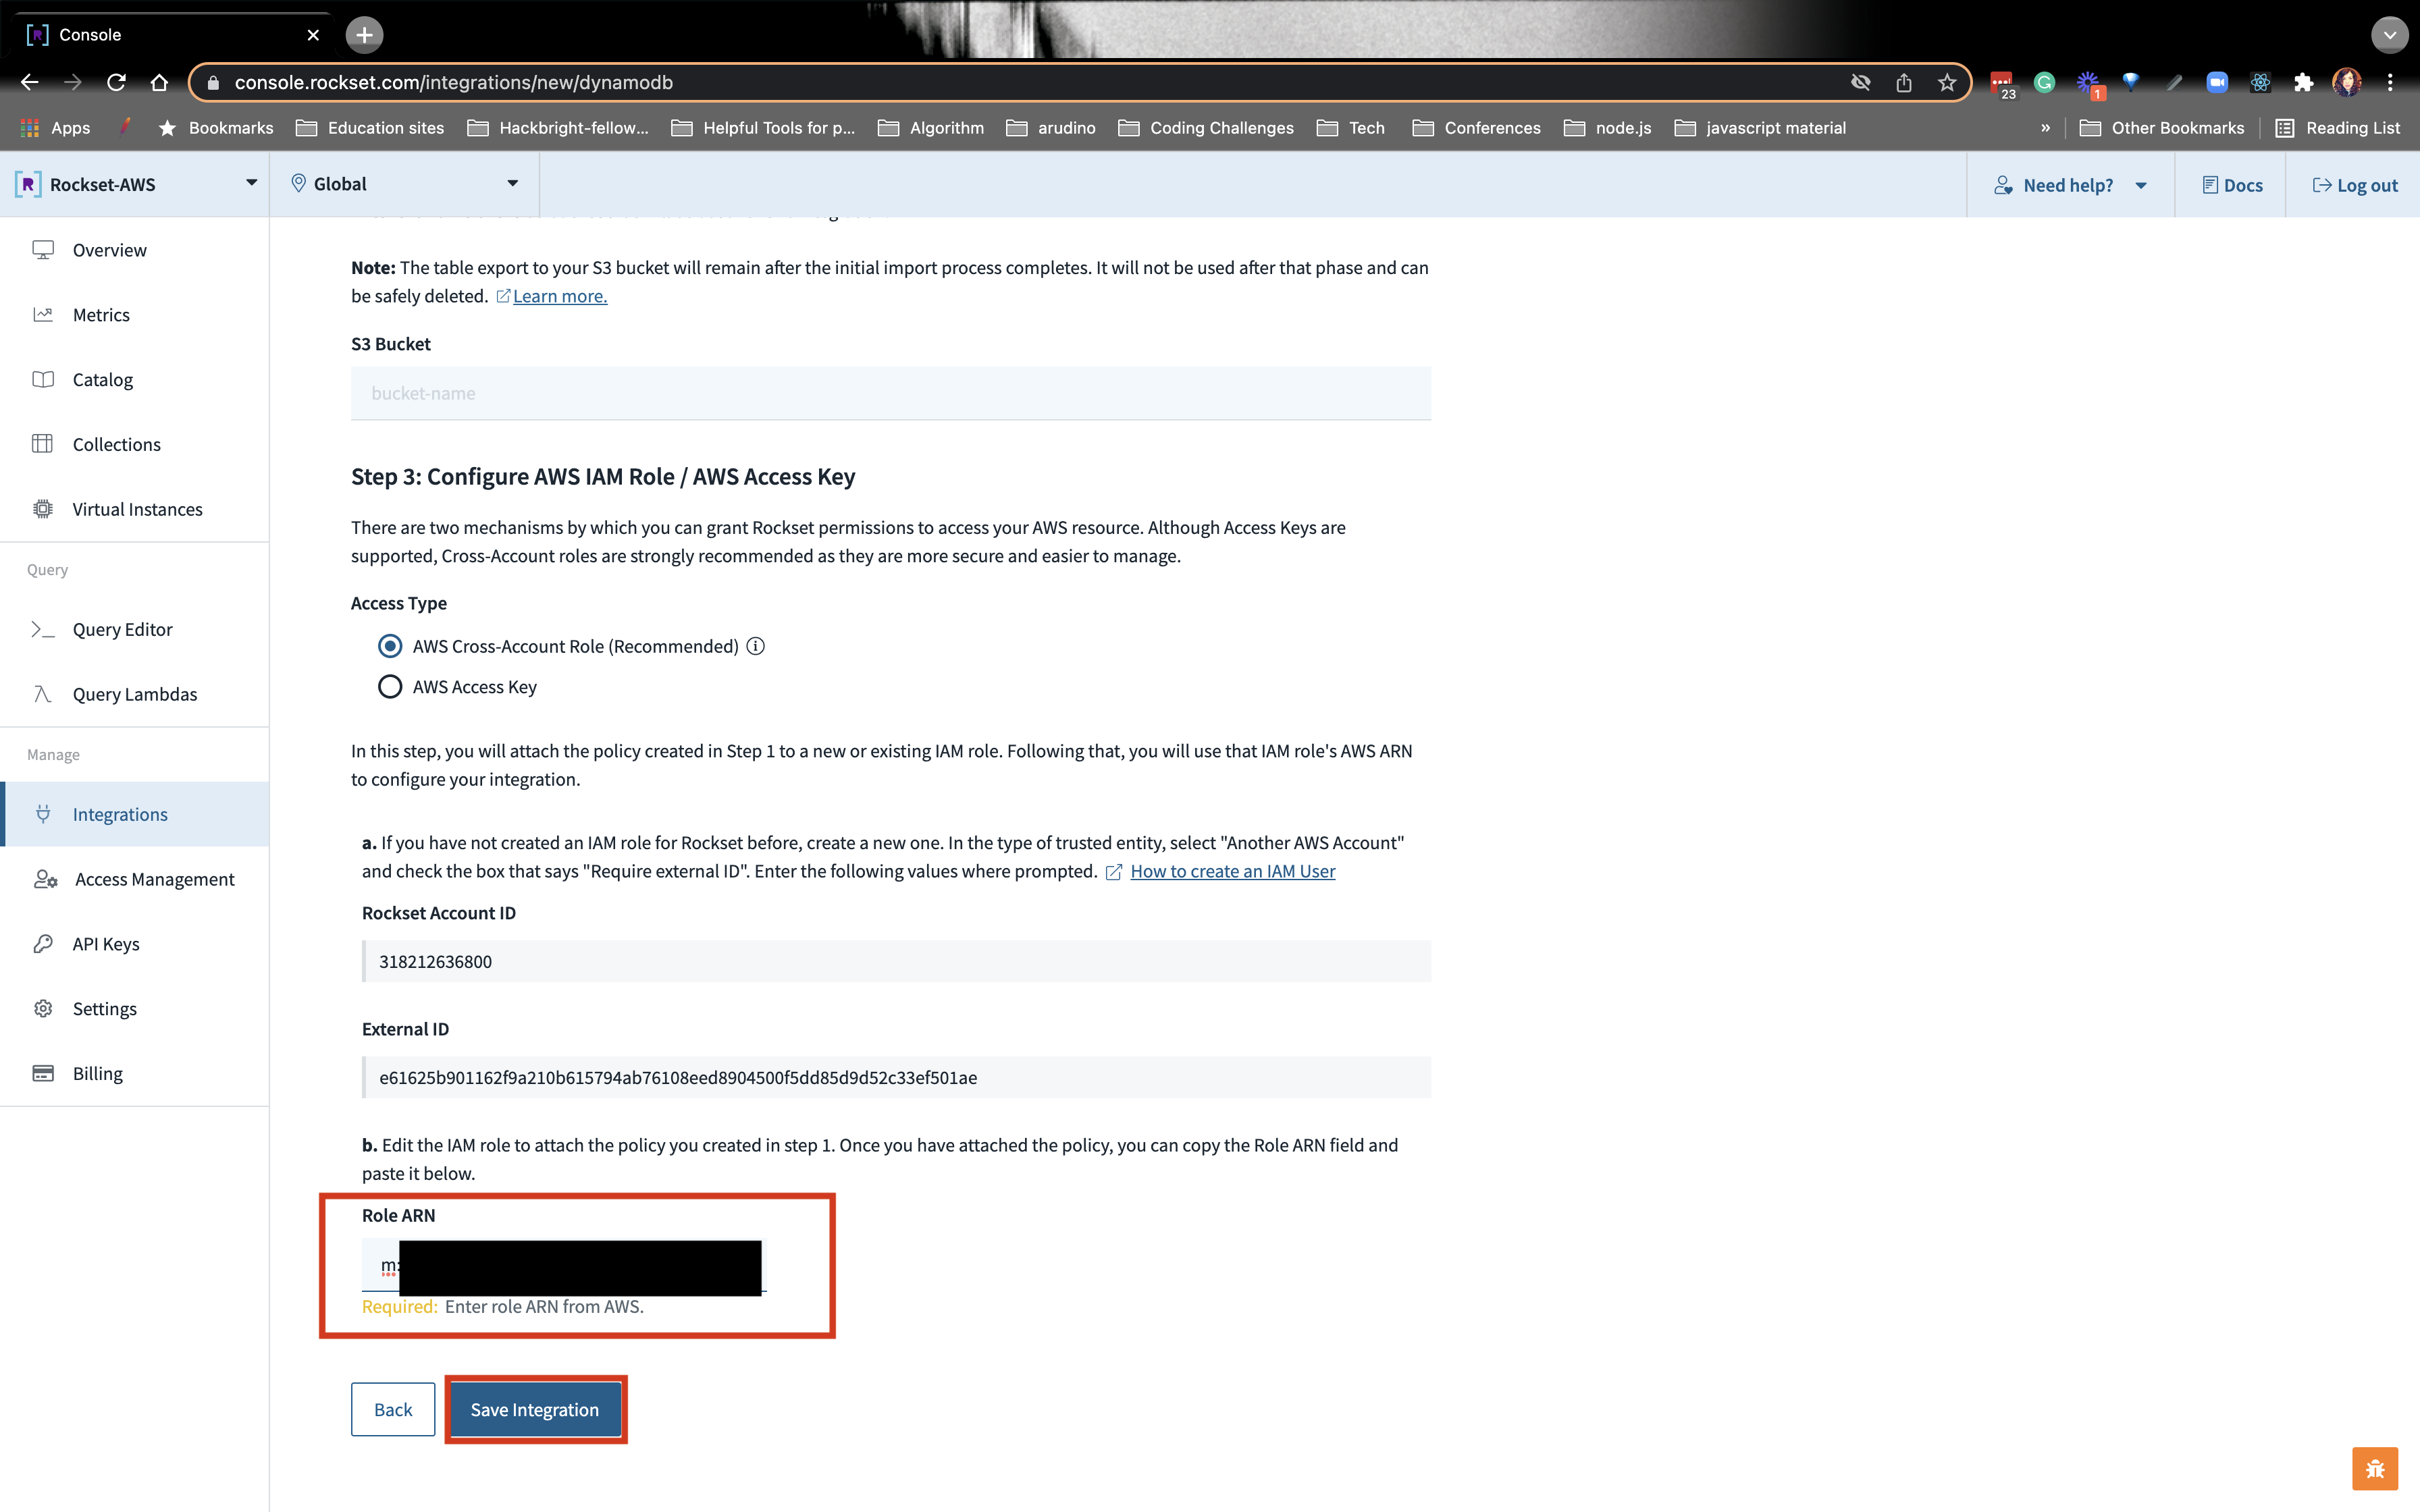
- Navigate back to the Rockset DynamoDB Integration page and paste the ARN Role value under Role ARN and Save Integration:
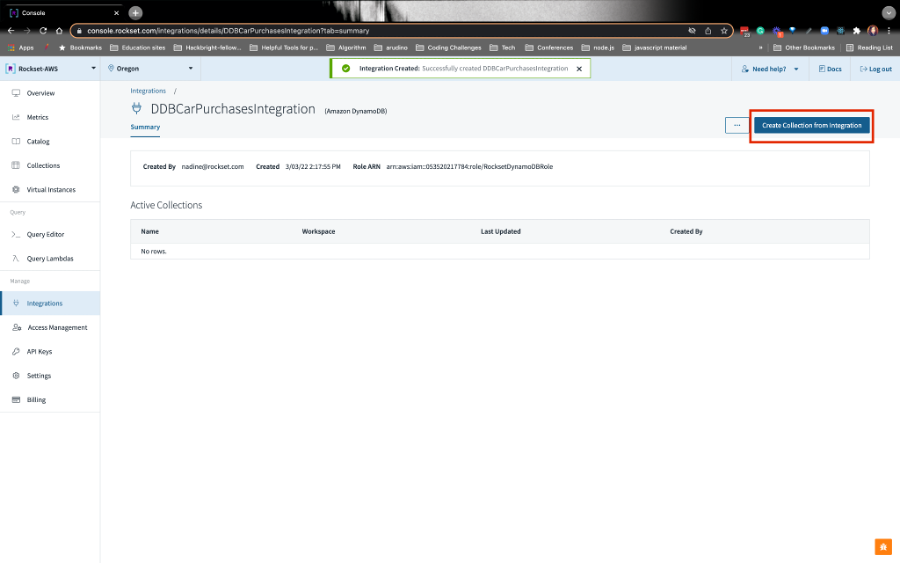
8. CREATE A COLLECTION FROM THE DYNAMODB INTEGRATION
- You’ll be brought back to the integration page. Click on the upper right Create Collection from Integration:
Refer to the image below:
a)Go ahead and give your collection the name CarPurchases.
b)From there go ahead and put the table name, rockset_carpurchases
c) The region should be us-east-1.
d) You should see a preview of the data on the right.
Your collection should look like this: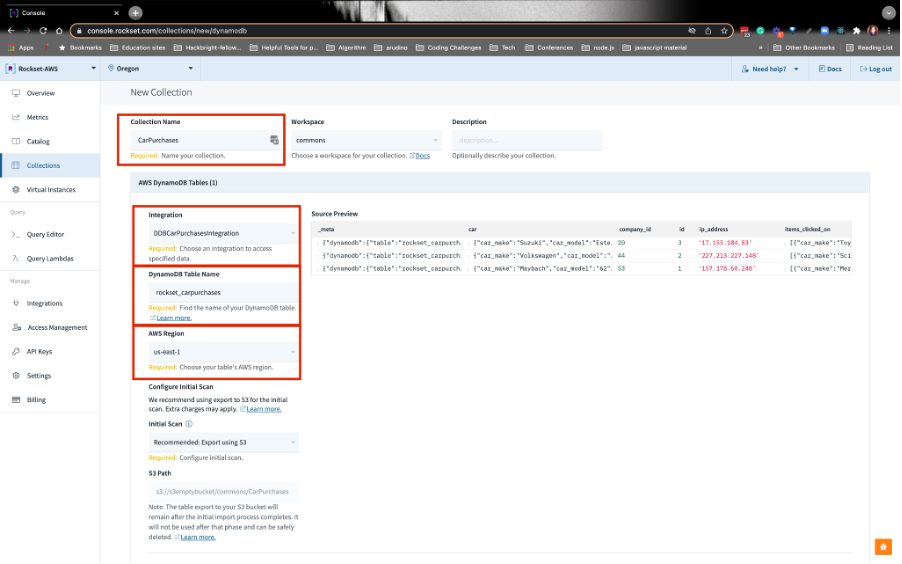
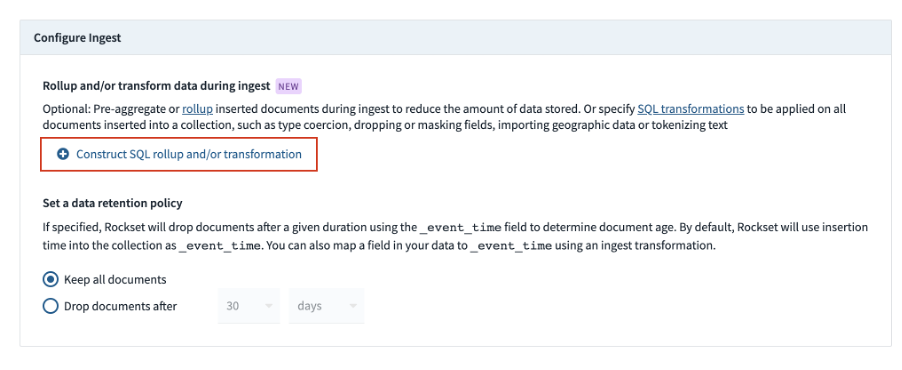
Towards the bottom at Configure Ingest, we have an opportunity to do query-based field mappings, also known as QBFMs. This is where we can massage the data as it’s being ingested into Rockset. QBFMs allow you to do SQL-based field mappings. This saves on storage and compute at query time (also known as run time). Click on Configure SQL rollups and/or transformations: